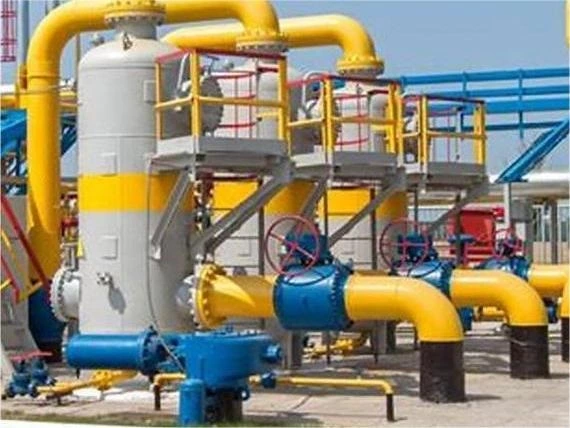
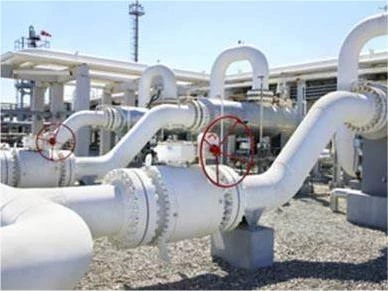
Mechanical Interlocking for Valve
As plants grew in size and processes became more complex, operat- ing at higher temperatures and pressures in harsher environments, the need for a more sophisticated method of locking became more import- ant. The possibility of sabotage also had to be considered. These concerns led to the development of the mechanical interlocking system, an engin- eered piece of equipment that can be fitted to all manual and actuated valves and only allows operation to be carried out in a sequence with other valves.
The mechanical locking device is essentially two components: first a metal housing with integral locks that is attached by bolts to the top works of the valve with the operator, either a handwheel or a wrench. Secondly there are two keys dedicated to these special clocks for opening or closure. One key is used to lock open the valve and the other key is used to lock closed the valve. The loose key, the one not in the valve, is always retained in a key cabinet (see Figures 10-3a and 10-3b) that is located in the control room, or used to open/close another valve. Only authorized “key” personnel will have access to this cabinet.
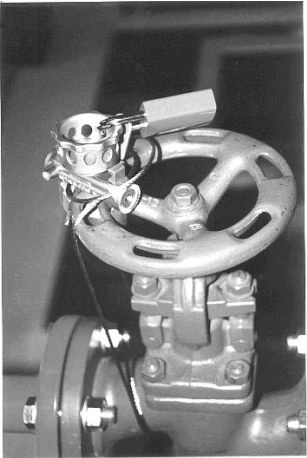
Figure 10-2. Wire on Globe Valve Handwheel with Independent Padlock.
Mechanical locking is a relatively inexpensive method of aiding process control and addingto the safe operation of a plant for the benefit of the plant personnel and the owner. These mechanical devices can be either installed during the construction phase of the plant or retrofitted while the plant is operating. At the moment mechanical locking devices are the best solution to creating a safe operating environment.
These locking devices are of a robust design and constructed of a combi- nation of materials that both have mechanical strength and are also suitable for the environmental conditions. Typically the housing will be constructed of a combination of carbon steel and stainless steel, however the key is most likely to be made of stainless-steel plate (see Figure 10-4, Figure 10-5, and Figure 10-6). Valves that are locked open or locked closed are usually identified as LO (locked open) or LC (locked closed); in addition to this an SP (Special Piping) is called up indicating that a special piece of equipment, that is mechanical interlocking, is requiredat a specified location.
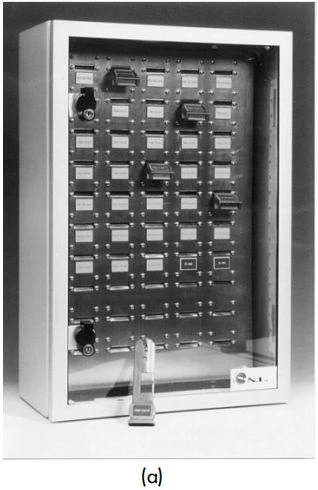
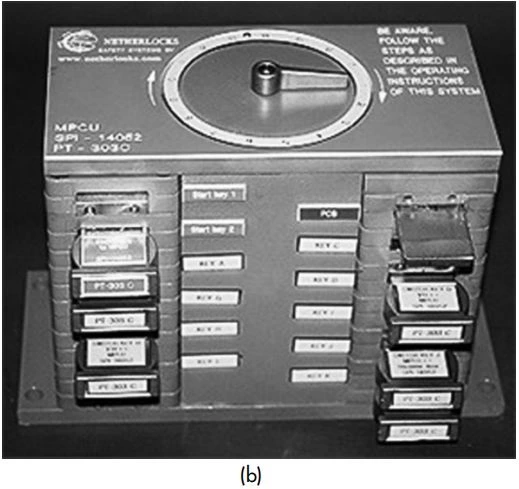
Figure 10-3. (a) and (b) Key Cabinets. (Courtesy of Netherlocks, Holland)
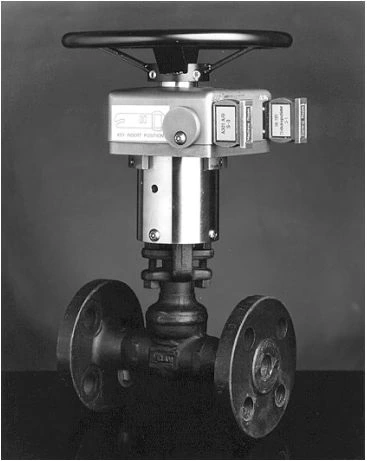
Figure 10-4. Gate Valve with Mechanical Locking Device.
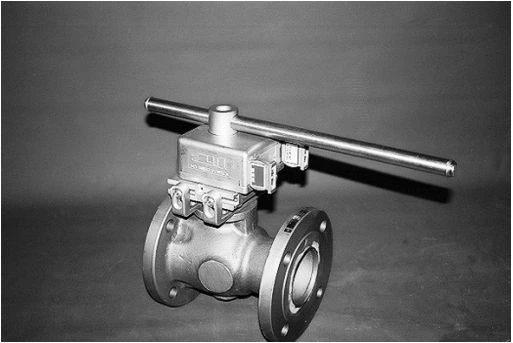
Figure 10-5. Ball Valve with Mechanical Locking Device
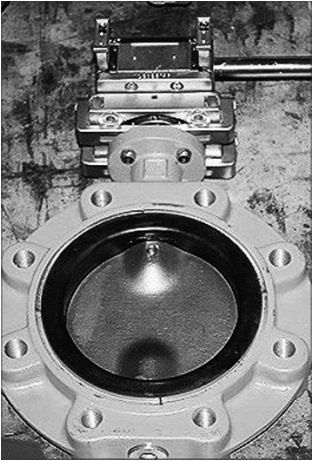
Figure 10-6. Buttery Valve with Mechanical Locking Device.
THE MECHANICAL INTER LOCKING OF PIPELINE LAUNCHERS AND RECEIVERS
Pipelines carrying product require periodic cleaning and this is achieved by cleaning elements called “pigs, ” which are propelled through the pipeline by water or the service uid. These pigs are introduced into the pipeline via a launcher, which is a piece of equipment comprising a pipe barrel, a closure door, and various nozzles.
When the pig is introduced into the pipeline it is essential that full depres- surization of the piping system has taken place, thus avoiding any accidents when the closure door has been opened while the system has been live. There have been numerous fatalities and injuries when this has happened and by introducing a mechanical interlocking procedure this problem can be solved.
Normal Operation Conditions
Under normal operating conditions the pipeline pig launcher is isolated and all valves are locked closed.
Starting scenario . See Figure 10-8.
Vent valve V4—locked closed
Isolating valve V3—locked closed
Pipeline valve V2—locked open
Isolating valve V1—locked closed
Launcher closure door—locked closed
Key Ain the control room
Step 1. Key A is removed from the control room and used to open the vent valve V4. This releases Key B.
Step 2. Key B is now used to open the closure door at the end of the launcher barrel.
Loading the pig
Vent valve V4—locked open
Isolating valve V3—locked closed
Pipeline valve V2—locked open
Throttling valve V1—locked open
Launcher closure door—locked open
No key in the control room
The pig can be placed in the barrel and prepared for launching.
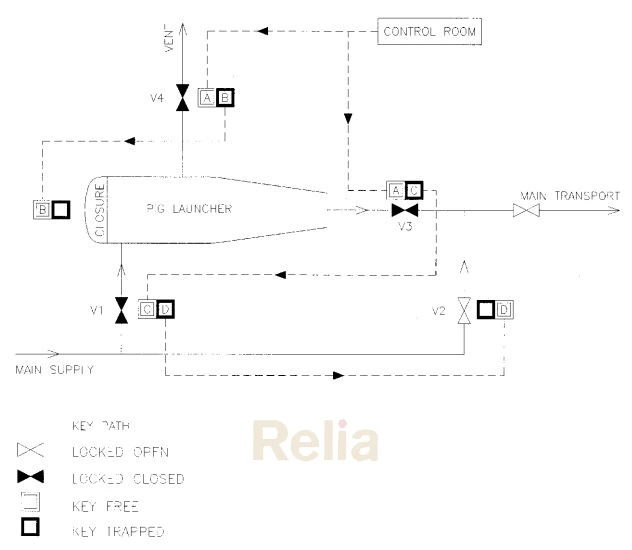
Figure 10-8. Pig Launcher Schematic.
Launching the pig
To re-instate the launcher, first a reverse key sequence has to take place.
Step 3. The launcher door is locked closed which releases Key B, which is used to lock closed vent V4. This releases Key A.
Step 4. Key A is used to lock open the isolating valve V3, which releases Key C.
Step 5. Key C is used to lock open valve V1, which releases Key D.
At this point the pig launcher is under full line pressure.
Step 8. Key D isused to lock closed the main pipeline valve V2.
The throttle valve, V2, is then used to restrict the ow through the launcher, which causes a pressure build-up behind the pig, until friction is overcome causing the pig to start its travel along the pipeline. Pressure to drive the pig will be sustained until the pig has completed its journey and arrived at the receiver vessel. The receiver will also be protected by a similar mechanically interlocked set of valves and a sequence of opening and clos- ing valves will have to be carried out before the receiver is depressurized, the door can be opened, and the pig retrieved from the barrel.
What has been described above is the basic procedure to launch and receive a pig, and this activity can be more complex with higher pressures, different piping configurations, and the addition of PSVs. But the objective is the same—that the launcher or a receiver can only be opened when they have been safely depressurized and drained of excess uid.
CONCLUSION
The use of mechanically interlocked valves has worked very successfully in recent years and because of the increase in safety, they have become a valuable addition to petrochemical plant equipment. There have been numerous plant accidents in the past that could have been avoided if an interlock system had been in place. Mechanical interlocks should not be looked upon as an accessory, but as an integral part of a piping safety relief system, which is essential to guarantee safe plant operation.
THE MECHANICAL INTER LOCKING OF PRESSURE SAFETY VALVES
Process plants that have pressurized piping systems must also have an integrated pressure relief system to avoid explosions caused by over- pressurization and possible in-service pipe failure. Pressure safety valves (PSVs) are the barrier between on the upstream the pressurized system and on the downstream relief to the atmosphere via an unvalved header.
A PSV contains a spring that is set to “pop” when overpressurization of the process piping system occurs and uid must be released to the atmo- sphere to avoid component failure. In order to execute maintenance to the in-service live PSV, a spare PSV of the same specification must be available for switchover. This change-over can take place while the plant is live, if the correct piping configuration is laid out. When this maintenance activity takes place, there is always a risk that the piping system or the vessel is left unprotected, which is a safety threat in the event of overpressurization. To avoid this risk, mechanical interlocks can be installed on the upstream and downstream isolating valves associated with the PRV. With these inter- locks installed the operators will only be able to open or close valves in a specific sequence, which means that the piping system or the vessel is always protected by a minimum of one PSV.
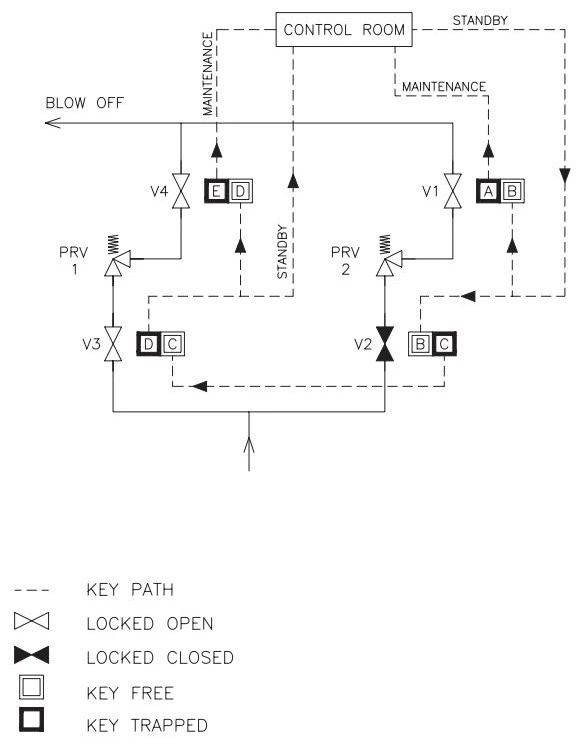
Figure 10-7. Double PRV Schematic
Procedure to Change Out PRV 1
See Figure 10-7.
Step 1— Starting scenario
PRV 1 in service
PRV 2 spare
V1, V3, V4—locked open
V2—locked closed
Key B in the control room
- Step 1. Key B is collected from the control room and inserted into the empty slot on V2. This valve can now be opened and locked and release Key C.
- Step 2. Key C can be inserted into the slot of V3, releasing Key D and allowing the valve to be locked closed.
- Step 3. Key D isused to lock closed V4 and release Key E.
- Step 4. Return Key E to the control room.
Intermediate scenario
PRV 1 out of service to be removed for repair
PRV 2 in service
V1, V2—locked open
V3, V4—locked closed
Key E in the control room
PRV 1 can be repaired and re-installed and Key E can be taken from the control room and used to lock open V4. This releases Key D which is returned to the control room.
Final scenario
PRV 1 spare
PRV 2 in service
V1, V2, V4—locked open
V3—locked closed
Key D in the Control Room
